Today's guest post is brought to you by knitter extraordinaire Ruth from rock + purl. Ruth comes to us from Sussex, UK, although I really wish she was based in Seoul because then I would suck all that knitting know-how out of her... Anyway, I was pretty happy when Ruth mentioned she was going to put together a tutorial for covering magazine holders because I am a magazine junkie and at the moment my storage 'solution' is to create teetering magazine towers where ever there's a scrap of space. I'm thinking a few of these color co-ordinated magazine holders might just be the answer...
-------------------------------------
I've recently been redecorating my studio and one of the most important parts of it was colour. Colour, paired with a need to organise my ever growing stash of magazines!
Magazine holders tend to fall under two categories - cheap and nasty or expensive and cute (and even then, they may not fit your colour scheme!).
As I couldn't find any holders that would match my studio and didn't make it look like a lawyer's office, I set off to do it myself.
[Click on 'Read More' to see the full tutorial after the jump!]
Here's what you need:
Cheap folder
All purpose PVA glue
One brush that you don't mind abusing
Craft knife
Wrapping paper or wallpaper. I chose wallpaper as there was no wrapping paper that didn't make me cringe.
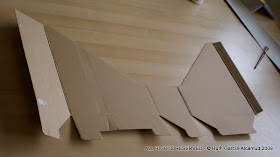
We'll start by opening the holder fully. Make sure you fold all the folds and crease all the creases. This will make your job easier down the line!
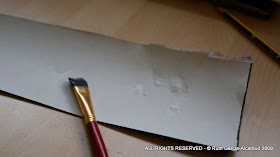
Spread glue all over the holder EXCEPT for the lower areas that 'box in' the entire thing.
Flip it upside down and cover it with your paper
With a heavy object, ensure that there are no bubbles underneath and smooth the entire paper. I use the end of a marble rolling pin that broke!
At the bottom (see now why I said don't glue there?) cut along the folding lines
At the sides, fold over and glue for a seamless construction
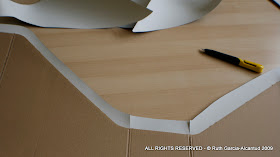
At the top, cut along the folding lines and at the same time...
Cut notches along any curved areas to ensure the paper can wrap around them
This way, the curves stay curvy and the paper doesn't bunch up!
At the bottom, trim ONE of the wider bigger areas of wrapping/wall paper and glue to the cardboard
Glue up the area that will hold the back spine together
Press it well and let it dry...
Once it's dry, we'll pay attention to the bottom. Box it up according to instructions
Like this!
Now, fold the one bigger wider area's paper that we didn't trim and glue down. Trim it if necessary for a cleaner look.
We have to deal with the other two sides of the bottom now!
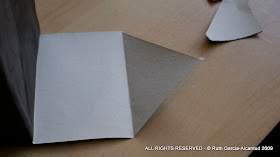
Fold and cut a small triangle at the end, that you will fold inside
As such, and glue it well!
Now glue the entire area of the short side and fold it so that it sticks... Do the same to the other side and you're done!
Doesn't it look MUCH nicer like that?
-------------------------------------
I would have to say - yes! It does look much nicer like that! Thanks for such a detailed tutorial Ruth...now I just need to choose my paper...
If you're a knitter you must go have a look at rock + purl, there are some fabulous patterns to be found there (including this free pattern for a truly gorgeous shrug - if anyone would like to knit me one of these let me know!).


No comments:
Post a Comment
Your comments make me happier than you could possibly imagine. Really! Thank you.